> ## Documentation Index
> Fetch the complete documentation index at: https://docs.saasio.io/llms.txt
> Use this file to discover all available pages before exploring further.
# Displaying Dynamic Data (Data Binding)
> Learn the magic of data binding. This guide explains how to connect your UI elements to your data sources like state variables, repeating groups, and the current user.
***
Imagine you have a label on a box. If you change what's inside the box, you want the label to magically update too. That's exactly what **Data Binding** is. It’s the magic that links your UI elements (the label) to your data (what’s in the box).
When your data changes, your UI updates automatically. This is the key to creating an interactive application.
***
## How to Bind Data to an Element
You can make almost any element dynamic, from a piece of text to an image source. The process starts in the **Properties Panel**.
On the canvas, click on the Text element, Image, or any other element you want to make dynamic.
In the **Properties Panel** on the right, find the property that controls the
element's content. This is often labeled **"Display"**. By default, it's set
to "Static Text".
Click the dropdown and change the value from "Static" to the source you want
to connect to. The most common choice is **"State Variable"**.
A new field will appear. Click it and choose the exact piece of data you want to display from the list.
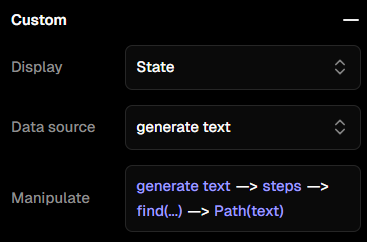 The element is now "bound" to your data. Whenever that data changes, the element on the screen will change with it, automatically.
***
## The Three Main Data Sources
You can bind your UI elements to three primary sources of data.
**What it is:** The temporary memory of your page.
**When to use it:** This is your go-to source for most dynamic data, like loading indicators, user
input from a form, or temporary results from an API call.
**What it is:** Data for a single item in a list you are displaying.
**When to use it:** When your element is **inside a Repeating Group** (a list).
This allows you to display a property from the specific item for that row,
like showing the `name` of each `Product` in a product list.
**What it is:** The database record for the user who is currently logged
into your application.
**When to use it:** Anytime you want to display
personalized information, like the user's name, email, or profile picture.
The element is now "bound" to your data. Whenever that data changes, the element on the screen will change with it, automatically.
***
## The Three Main Data Sources
You can bind your UI elements to three primary sources of data.
**What it is:** The temporary memory of your page.
**When to use it:** This is your go-to source for most dynamic data, like loading indicators, user
input from a form, or temporary results from an API call.
**What it is:** Data for a single item in a list you are displaying.
**When to use it:** When your element is **inside a Repeating Group** (a list).
This allows you to display a property from the specific item for that row,
like showing the `name` of each `Product` in a product list.
**What it is:** The database record for the user who is currently logged
into your application.
**When to use it:** Anytime you want to display
personalized information, like the user's name, email, or profile picture.